Experiencing the garden includes all the sounds: birds, water features, frogs, wind, raindrops, and even a passing train. Of course, closed windows mean that experience is lost when inside the house. For a while, we have been wishing for a way to bring nature sounds inside and finally we did something about it!
We found a few products online marketed to provide that function. They combined microphones and speakers, but they seemed limited and pricey for what you got. We also saw some creative uses of security camera audio and phone apps (e.g. Ring devices and app).
Eventually we opted for a DYI approach. Basically, we needed:
- An outdoor microphone that could handle the elements
- A way to get the microphone signal inside the house
- A way to get the microphone signal to speaker(s)
- Interior speaker(s)
Here is a diagram of what we ended up with:

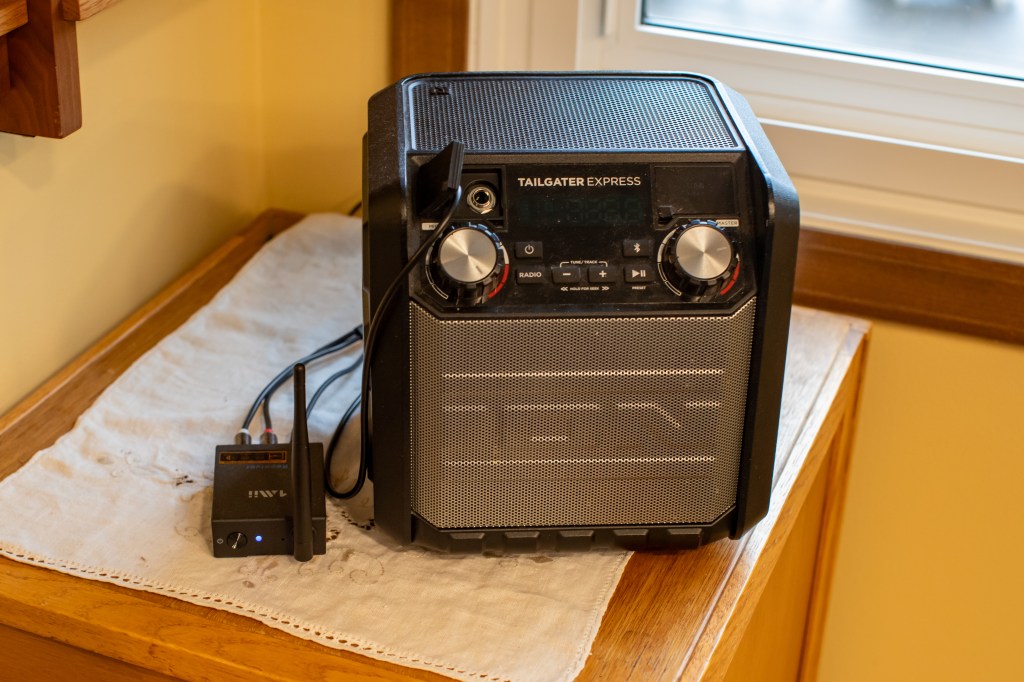
The microphone wire goes into the basement and connects to an audio transmitter. The transmitter came with two audio receivers. We put one in the kitchen-dining area and one in Terri’s office. A powered speaker plugs into the receiver (we used ones that we had around). Both can be used at the same time. The cost for the components (not including speakers) came in at about $140.
We are pleased with the results! It is so nice to hear the sounds of nature while we are inside. The audio has enough quality so we can successfully use audio identification on the Merlin phone app!
The following is a more detailed description of the project. The photos of the electronics are linked to their Amazon pages.
Outdoor Microphone
We opted for a stand-alone omnidirectional outdoor microphone that was designed for a security system. It came with its own plug-in power and is weatherproof. The other option was to go with a more traditional microphone but that would require providing it shelter (perhaps under an eave) and a pre-amp to power it. A traditional microphone might have better sound quality, but we are happy with our choice.
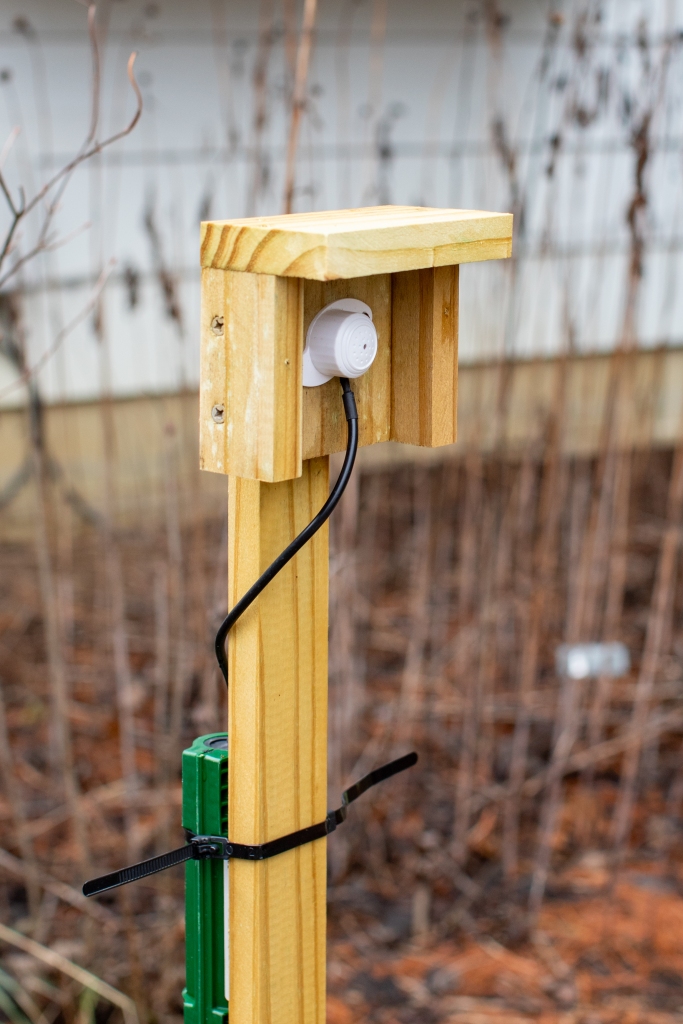
I mounted the microphone outside on a stake with a bit of shelter. The stake lets me position it easily. The shelter is more about managing extraneous sounds (rainfall, neighbors, street, etc.) than weatherproofing. The connectors on the wire do need waterproofing (see green enclosure on stake below).
Getting the Signal into the House
This was the trickier piece of the puzzle. In the end, I ran the microphone wire through the header joist (vertical board on top of foundation going around a house) into the basement. There was an unused phone cable going into the basement, so I pulled it out and used that existing hole. Once the wire was through, I sealed around the cable in the hole.
A hole through the header joist is how cable companies often get cable into a home. The header joist typically is only 1.5” of pine wood and it is below the walls of the house so you are not dealing with drywall etc. You do need to inspect the area from inside to make sure there are no utilities (electric, plumbing, gas, cable, etc.) near the intended hole before drilling.
There are a couple of other ways of doing this but they did not work in our situation.
- Option 1… Run the wire through the gap in a window. That was not possible with our windows because they close too tightly.
- Option 2… Put some kind of wireless transmitter outside. I tried running the microphone wire into a Bluetooth transmitter box that was outside but sheltered by the ceiling over our sliding door stoop. This would get the signal into the house wirelessly as long as the speakers had a Bluetooth function. This worked great but the Bluetooth transmitter kept going to sleep when the speaker was turned off and I had to go outside to restart it. Perhaps a different brand would not do this. Even though the transmitter was sheltered, I still had concerns about temperature extremes.
Getting the Signal to the Speaker(s)
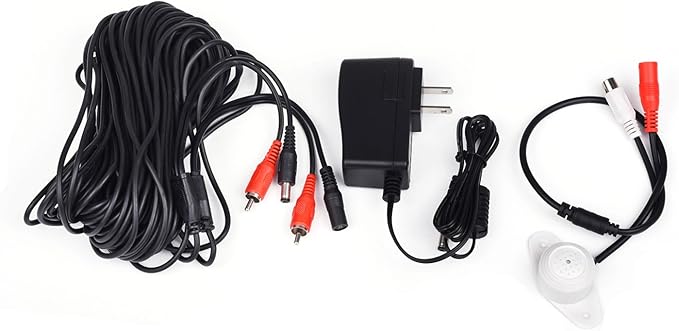
We wanted flexibility in terms of where we had speakers and did not want to run wires throughout the house, so we went with a wireless approach. I got a wireless audio set which has a transmitting box and two receiving boxes (there is also a kit with just one receiver). Each unit needs to be plugged into an outlet for power. A short RCA cable connects the receiver to the speaker.
Photos by Randy Litchfield unless otherwise noted
© Randy Litchfield, some rights reserved (CC-BY-NC)
